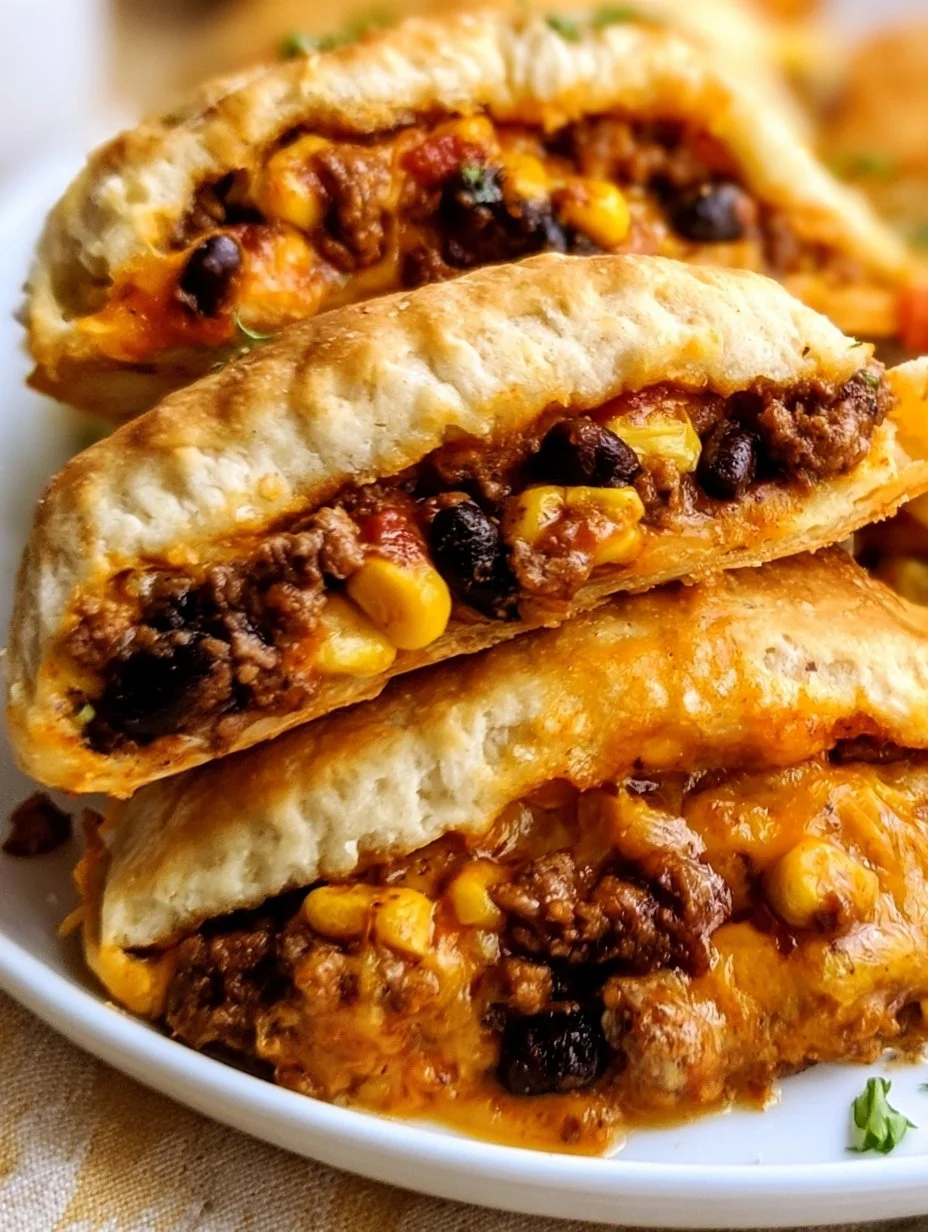
There’s something undeniably magical about a warm, flaky crust enveloping a savory filling that oozes comfort and joy with every bite. As you take a bite into these delightful Cheeseburger Pockets, the crispness of the golden-brown exterior gives way to a gooey mélange of mouthwatering cheeseburger goodness. The aroma wafts through your kitchen, teasing your senses and beckoning everyone to gather around. The anticipation builds, the table is set, and soon, each pocket reveals a burst of flavor—a nostalgic nod to backyard barbecues and family gatherings, delivered in a portable, hand-held delight.
As you sink your teeth into the tender pie crust, you discover the warm combination of seasoned ground beef, the sweetness of sautéed onions, and the rich, melting cheddar cheese that envelops it all. Each pocket feels like a warm embrace, comforting you with its crunch and creaminess. Dipping them into a tangy ketchup or zesty mustard enhances the experience, making every mouthful feel like a slice of happiness. No wonder this recipe has found its way into the hearts and homes of many!
Why You’ll Love This Cheeseburger Pockets
This recipe stands out for so many reasons. Not only do cheeseburger pockets cater to the quintessential comfort food cravings, but they also bring nostalgia to the table, evoking fond memories of picnics and potlucks. You can make them for casual family dinners, serve them at parties as appetizers, or enjoy them as a quick weeknight meal. Their versatility is immense; you can customize the fillings to suit any taste, ensuring that everyone finds their perfect pocket.
What’s more, they are a fun way to indulge without the need for a plate and utensils—ideal for those nights when you want to keep things cozy and relaxed. Plus, kids adore these little bundles of joy! Watch their faces light up as they unwrap their very own cheeseburger pocket, complete with dipping sauce. And let’s not forget how quick and uncomplicated they are to whip up. In about thirty minutes, you can have golden pockets cooling on your counter, ready to be devoured!
Preparation Phase & Tools to Use
Before diving into this delightful recipe, let’s get organized. Setting your kitchen up for success enhances the joy of cooking. Gather the following essentials:
- Skillet: A good non-stick skillet allows even cooking of your filling. You want the ground beef to turn brown and develop that savory crust.
- Rolling Pin: While you can use a wine bottle in a pinch, a rolling pin makes working with your pie crust easy and enjoyable.
- Bowl or Cutter for Circles: This ensures uniformity, helping each pocket cook evenly. You can use any round object; a bowl works perfectly!
- Fork: Not only for sealing pockets but also for crimping the edges, creating a beautiful presentation while ensuring no filling escapes.
- Baking Sheet: You’ll need a non-stick or lined baking sheet to hold your pockets as they turn golden in the oven.
Practical Preparation Tips
- Always preheat your oven in advance to ensure a consistent baking temperature.
- Prepare your ingredients before cooking to streamline the process; mise en place makes everything easier.
- Keep your surface lightly floured to prevent the dough from sticking as you roll and cut.
Ingredients for Cheeseburger Pockets
- 1 lb ground beef: This forms the hearty base of your filling. You can substitute it with ground turkey or chicken for a lighter option.
- 1 small onion, diced: Sweetens the mixture and adds depth of flavor. Shallots can also work well if you prefer less pungency.
- 1 cup shredded cheddar cheese: Melty and savory, cheddar creates that irresistible cheesiness. Feel free to mix in Monterey Jack or even pepper jack for a touch of heat.
- 1 tbsp ketchup: A dash of sweetness that complements the beef beautifully. Try BBQ sauce for a smoky twist.
- 1 tbsp mustard: Adds a zesty kick. Dijon or whole-grain mustard can elevate the flavors if you’re feeling adventurous.
- 1 package refrigerated pie crusts: These save time and effort, giving you a flaky foundation. If you’re feeling ambitious, homemade crust can add an extra layer of love.
- Salt and pepper to taste: Essential for seasoning your filling. Don’t forget to taste as you mix!
- 1 egg, beaten (for egg wash): This gives your pockets that gorgeous golden sheen, making them irresistible.
How to Make Cheeseburger Pockets
- Preheat your oven to 400°F (200°C). This is the magic temperature where your pockets will transform into golden perfection.
- In a skillet, cook the ground beef and diced onion over medium heat, stirring frequently. Cook until the beef is browned and crumbled – about 5-7 minutes. Drain any excess fat for a leaner bite.
- Stir in the ketchup, mustard, salt, and pepper until combined, letting the mixture simmer for a few moments to meld the flavors. Let it cool slightly while you prepare the crust.
- Roll out the pie crusts on a lightly floured surface, making them a bit thinner for a delicate texture. Use a bowl or cookie cutter to cut out circles, approximately 4-5 inches in diameter.
- Place a spoonful of your savory beef mixture and a sprinkle of cheese right in the center of each circle. Use enough to fill them, but don’t overstuff!
- Fold the crust over, creating a half-moon shape. Seal the edges by pressing them with a fork; this not only keeps the filling inside but enhances the visual appeal.
- Brush the tops with the beaten egg to achieve that alluring golden finish when baked.
- Place your pockets on a baking sheet lined with parchment or lightly greased. Bake for 15-20 minutes or until they turn a beautiful golden brown and your kitchen fills with an irresistible aroma.
- Serve warm, and watch your family and friends dive into these delightful pockets of goodness!
Chef’s Notes & Helpful Tips
- Make-ahead tips: Assemble your cheeseburger pockets ahead of time and store them uncooked in the fridge for a few hours. You can even freeze them for a hungry night; just bake them straight from the freezer, increasing the baking time by a few minutes.
- Cooking alternatives: An air fryer can provide a delightful crunch without the extra oil. Cook at 360°F for about 10-12 minutes, flipping halfway through for even browning.
- Customization ideas: Add diced pickles for that signature cheeseburger bite! Swap in different cheeses or toss in some chopped bell peppers or mushrooms for added texture and flavor.
Common Mistakes to Avoid
- Overfilling pockets: Resist the urge to overstuff. More filling can lead to bursting during baking. Stick to a tablespoonful per pocket.
- Not sealing edges properly: Make sure the edges are securely sealed to keep the filling intact. Pressing them firmly with a fork helps.
- Skipping the egg wash: Skipping this step might result in pale, unappealing pockets. A golden crust enhances both the visual and flavor appeal.
What to Serve With Cheeseburger Pockets
Pair these irresistible pockets with complementary sides to elevate your meal:
- Crispy French Fries: The classic choice that adds just the right amount of crunch.
- Fresh Garden Salad: A light and refreshing counterpoint to the rich pockets; toss in your favorite veggies and dressing.
- Potato Wedges: Seasoned and oven-baked, they add heartiness without overshadowing the main attraction.
- Coleslaw: The tangy crunch helps balance the savory goodness of the cheeseburger filling.
- Pickles: Add a tangy crunch that mirrors the burger experience.
- Dipping sauces: Ketchup, mustard, ranch dressing, or even spicy sriracha sauce create mouthwatering flavor explosions with every bite.
Storage & Reheating Instructions
These cheeseburger pockets store beautifully. Keep leftovers in an airtight container in the fridge for up to three days. For longer storage, freeze them wrapped individually in plastic wrap and then in a freezer bag for up to three months.
When it’s time to enjoy them again, reheat in a 350°F oven for about 10-15 minutes, or until warm and crispy. You can also microwave for about 30 seconds, but be warned; the crust won’t retain its signature crispness.
Estimated Nutrition Information
- Serving Size: 1 pocket
- Calories: Approximately 250
- Protein: 12g
- Carbohydrates: 22g
- Fat: 13g
(Note: These values are approximate and can vary based on specific brands and ingredient alterations.)
FAQs
How do I make these pockets vegetarian?
To create a vegetarian version, swap the ground beef for textured vegetable protein or lentils. Season well, and consider adding finely chopped mushrooms for added texture.
Can I use homemade pie crust?
Absolutely! A homemade crust can elevate these pockets with fresh flavors and a personal touch. Just make sure it’s rolled out thinly for the best results.
What can I add for extra flavor?
Incorporate spices like garlic powder, smoked paprika, or even Worcestershire sauce for an extra depth of flavor in the filling.
Are these pockets kid-friendly?
Definitely! Kids will love the fun of unwrapping and dipping their own pockets, and you can easily adapt the filling to include their favorite ingredients.
Can I bake these pockets ahead of time?
Yes! Bake them in advance, cool, and store in the fridge. Reheat them in the oven and they’ll taste just as delicious!
With their tantalizing aroma and comforting warmth, cheeseburger pockets invite everyone to gather around the table. They stand as a testament to how simple ingredients can come together to create pure joy. Whether for a cozy family dinner, a lively gathering, or a quick snack, these pockets deliver a satisfying experience with every bite. So roll up your sleeves, feel the flour on your hands, and enjoy crafting these delightful bundles of happiness. Your taste buds will thank you, and your loved ones will be thrilled to savor every morsel!
Print
Cheeseburger Pockets
- Prep Time: 15 minutes
- Cook Time: 20 minutes
- Total Time: 35 minutes
- Yield: 4 servings 1x
- Category: Main Course
- Method: Baking
- Cuisine: American
- Diet: Beef
Description
Comforting cheeseburger pockets with a flaky crust and a savory filling, perfect for snacks or casual meals.
Ingredients
- 1 lb ground beef
- 1 small onion, diced
- 1 cup shredded cheddar cheese
- 1 tbsp ketchup
- 1 tbsp mustard
- 1 package refrigerated pie crusts
- Salt and pepper to taste
- 1 egg, beaten (for egg wash)
Instructions
- Preheat your oven to 400°F (200°C).
- Cook the ground beef and diced onion in a skillet over medium heat for about 5-7 minutes until browned.
- Stir in the ketchup, mustard, salt, and pepper, then let it cool slightly.
- Roll out the pie crusts on a lightly floured surface and cut into circles.
- Place the beef mixture and cheese in the center of each circle.
- Fold over and seal edges with a fork.
- Brush with beaten egg.
- Bake for 15-20 minutes until golden brown.
Notes
Freezable uncooked. Bake from frozen for an extra few minutes.
Nutrition
- Serving Size: 1 pocket
- Calories: 250
- Sugar: 1g
- Sodium: 500mg
- Fat: 13g
- Saturated Fat: 5g
- Unsaturated Fat: 8g
- Trans Fat: 0g
- Carbohydrates: 22g
- Fiber: 1g
- Protein: 12g
- Cholesterol: 40mg