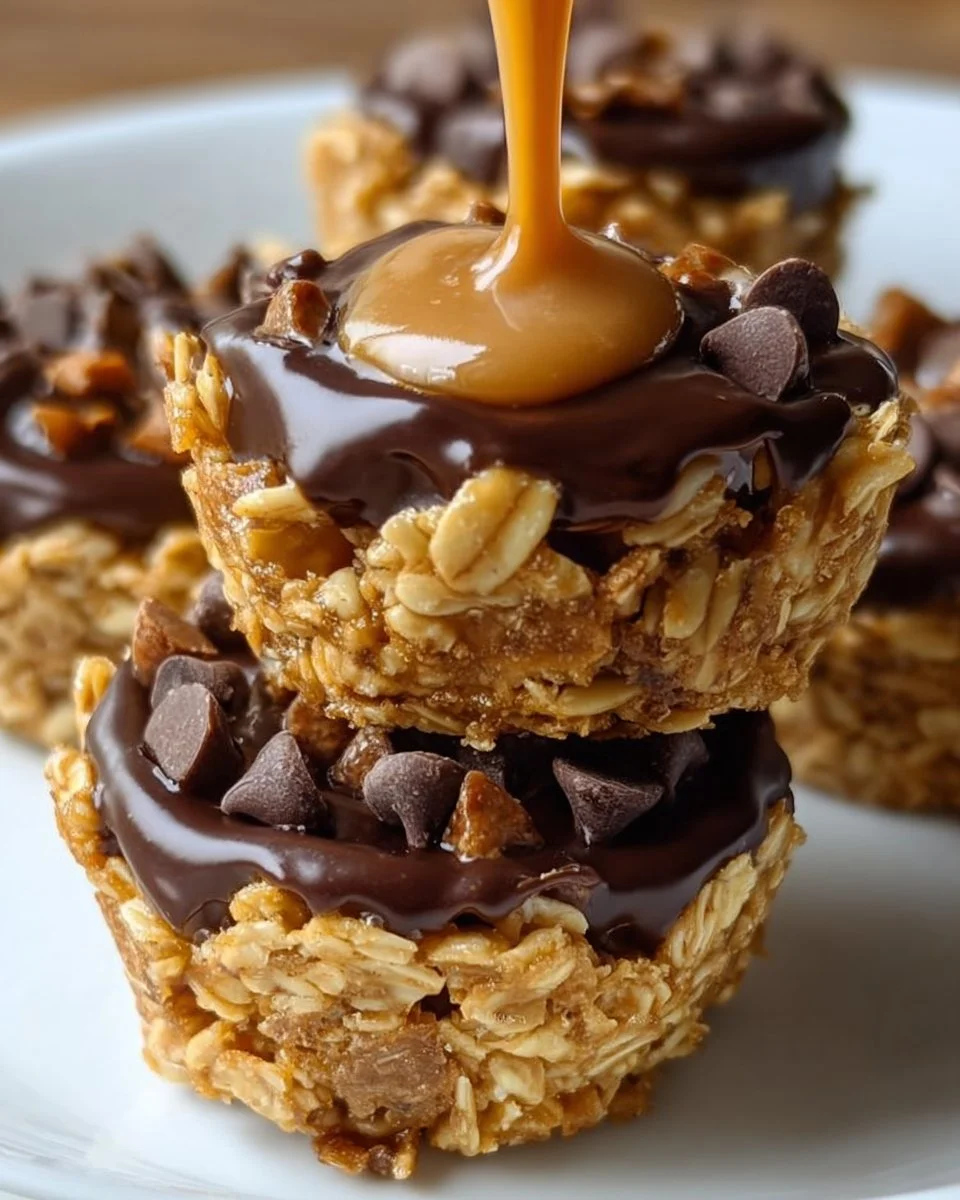
The sun dips low in the sky, casting a warm golden hue through your kitchen window. The rich, nutty aroma of peanut butter envelops the room, stirring the senses awake. As you prepare to indulge in a no-bake treat that marries simplicity with deliciousness, anticipation builds. Picture crunchy granola, sweet honey or maple syrup, and smooth, creamy peanut butter coming together, forming delightful little cups bursting with flavor and texture. Each bite promises a satisfying crunch followed by the creamy richness of chocolate chips, creating a heavenly union that is hard to resist.
You’re moments away from creating these No Bake Peanut Butter Granola Cups—a treat that calls out to snack lovers, dessert enthusiasts, and health-conscious eaters alike. With no baking required, this recipe encourages spontaneity, allowing you to whip up a sweet snack in mere minutes. It embodies that perfect balance of naughty and nice: indulge your taste buds while savoring wholesome ingredients that nourish your body. The vibrant colors of melted chocolate and golden oats beckon for attention, promising that each granola cup is as delightful to the eyes as to the palate.
If you crave a delightful, energy-boosting snack that you can grab on-the-go, look no further. These cups are not just a treat; they are an experience that transforms snacking into something extraordinary. Perfect for busy mornings, afternoon pick-me-ups, or late-night cravings, this recipe checks all the boxes.
Why You’ll Love This No Bake Peanut Butter Granola Cups
These No Bake Peanut Butter Granola Cups shine with versatility and flavor. Not only do they explode with the rich taste of peanut butter and honey, but they also offer the satisfying crunch of granola and the sweet indulgence of mini chocolate chips. They’re a sweet treat without the guilt, making them perfect for those looking to satisfy their cravings with something wholesome.
Imagine packing these cups for lunch, tossing them into your gym bag for a post-workout snack, or serving them at a casual gathering. Each granola cup stands out not just for its deliciousness but also its delightful portability. You can share them with friends or keep them all for yourself— we won’t judge!
Preparation Phase & Tools to Use
Before diving into this delectable treat, gather your tools and ingredients, ensuring a smooth preparation process.
-
Mixing Bowl: A medium-sized bowl will serve as your workspace, bringing all your ingredients together.
-
Muffin Tin: This is crucial for shaping your cups—choose one you love, whether it’s silicone for easy removal or metal for durability.
-
Cupcake Liners: Optional but highly recommended, these liners not only help in easy removal but also add a touch of whimsy.
-
Spatula: A sturdy spatula is perfect for mixing your ingredients and packing them into the muffin tin tightly.
-
Refrigerator: After assembling, the fridge is your friend, allowing the cups to set and hold their shape.
Preparation Tip: Keep your ingredients close at hand, and don’t hesitate to line your muffin tin ahead of time. You’ll thank yourself later!
Ingredients for No Bake Peanut Butter Granola Cups
-
1 cup granola: This provides the crunchy base for your cups. Feel free to use your favorite variety—homemade, store-bought, or gluten-free options all work wonderfully.
-
1/2 cup creamy peanut butter: Creamy, luscious peanut butter holds everything together, offering an irresistible flavor. Almond or cashew butter can serve as tasty substitutes.
-
1/4 cup honey or maple syrup: For sweetness, you can opt for honey for a more traditional taste, or maple syrup for a unique twist.
-
1/4 cup mini chocolate chips: These little bursts of sweetness pair perfectly with the peanut butter and can be swapped with chopped nuts or dried fruits for a healthier option.
-
1/2 teaspoon vanilla extract: This adds depth to the overall flavor, enriching the sweetness and complementing the peanut butter beautifully.
How to Make No Bake Peanut Butter Granola Cups
-
Combine Ingredients: In a mixing bowl, combine granola, creamy peanut butter, honey or maple syrup, mini chocolate chips, and vanilla extract. Stir until every piece of granola captures the essence of peanut butter and sweetness—this is the heart of your delicious cups.
-
Prepare Muffin Tin: Line a muffin tin with cupcake liners. This simple step guarantees easy removal after your cups set.
-
Fill the Cups: Spoon the mixture evenly into each muffin cup, pressing down firmly so they maintain their shape. The more compact, the better the cups hold together when you’re ready to dig in.
-
Chill Out: Place the muffin tin into the refrigerator for at least 30 minutes, allowing the mixture to firm up—a crucial step that transforms your concoction into delightful cups.
-
Enjoy!: Once set, gently remove the cups from the muffin tin and savor each morsel! These are fantastic as a snack, dessert or even breakfast.
Chef’s Notes & Helpful Tips
-
Make-Ahead Tips: These granola cups store perfectly in the fridge for up to a week. If you prefer longer storage, try freezing them, where they can last for up to three months.
-
Cooking Alternatives: If you’re feeling adventurous, consider using an air fryer to cook the cups slightly, giving them a warm, melted texture that contrasts beautifully with the crunchy granola.
-
Customization Ideas: Don’t hesitate to get creative! Add a pinch of cinnamon for a warm flavor, swap the chocolate chips for dried fruits for a healthier option, or use crunchy peanut butter for extra texture.
Common Mistakes to Avoid
-
Too Loose Mixture: If your mixture is not sticking together well, add a bit more peanut butter or sweetener until it reaches the desired consistency.
-
Skipping the Chill: Don’t underestimate the importance of that chilling step. Skipping it will result in cups that crumble rather than hold their form.
-
Over-filling the Cups: Resist the urge to overfill each muffin cup. Pressing them down well is key, but they also need room to expand slightly.
What to Serve With No Bake Peanut Butter Granola Cups
These granola cups stand beautifully on their own, but pairing them with the right companions can elevate your snacking experience. Consider serving with:
-
Fresh Fruit: Slices of apples or bananas enhance the experience, adding a refreshing, juicy contrast.
-
Yogurt: A dollop of Greek yogurt makes for an indulgent breakfast when paired with a granola cup for extra protein.
-
Coffee or Tea: The nutty flavors of peanut butter and a warm cup of coffee or tea create a perfect afternoon break.
-
Nut Milk: Almond, oat, or coconut milk offers a dairy-free beverage option that blends beautifully with the nuttiness of these cups.
-
Chocolate Smoothie: A creamy chocolate smoothie complements the rich peanut butter flavor and makes for a stellar breakfast.
-
Cheese Platter: For a savory twist, serve with a cheese platter to create a delightful balance of flavors.
-
Trail Mix: Enjoy them alongside a mix of your favorite nuts and dried fruits for a nutritious snack.
Storage & Reheating Instructions
Store these delicious No Bake Peanut Butter Granola Cups in an airtight container in the fridge for up to one week. For longer storage, pop them into the freezer, ensuring they are well-wrapped to prevent freezer burn. When you’re ready to enjoy them, simply thaw in the fridge overnight or let them sit on the counter for 15-20 minutes.
Estimated Nutrition Information
Each granola cup provides an approximate breakdown of 150 calories, 7g of protein, 10g of fat, and 15g of carbohydrates. Keep in mind that actual values may vary depending on ingredient brands and specific quantities used.
FAQs
1. Can I use crunchy peanut butter instead?
Absolutely! Crunchy peanut butter adds a delightful texture to every bite, enhancing the experience with little bits of peanuts.
2. Are these granola cups gluten-free?
They can be gluten-free if you use certified gluten-free granola. Always check ingredient labels if you are highly sensitive to gluten.
3. How can I make these vegan?
Swap honey for maple syrup and ensure your granola and chocolate chips are vegan-friendly.
4. Can I add protein powder to the mix?
Yes, adding a scoop of protein powder is a fantastic way to boost the nutritional value of your granola cups. It may alter the texture slightly so adjust with additional peanut butter or sweetener.
5. How do I make them less sweet?
If you prefer less sweetness, reduce the amount of honey or maple syrup. You can also omit or reduce the chocolate chips to suit your taste preferences.
The moment has come! Embrace the heavenly combination of nutty, sweet, and rich flavors in these No Bake Peanut Butter Granola Cups. They promise a deliciously satisfying experience with every bite. Whether you’re snacking alone or sharing with loved ones, these delightful cups invite you to slow down, indulge, and relish the moment. Don’t just read about it—roll up your sleeves, grab your ingredients, and let the deliciousness begin! Happy snacking!
Print
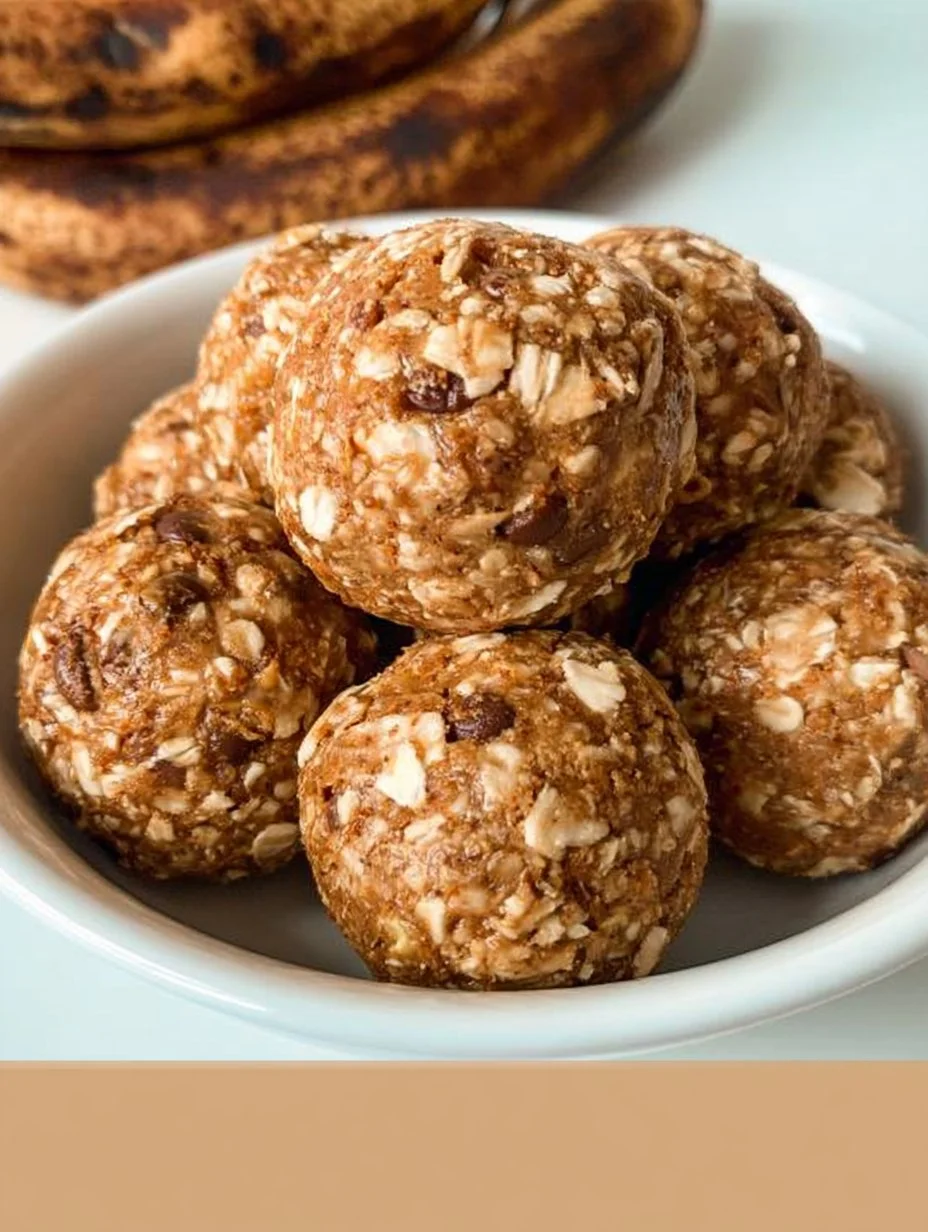
No Bake Peanut Butter Granola Cups
- Prep Time: 10 minutes
- Cook Time: 0 minutes
- Total Time: 40 minutes
- Yield: 12 servings 1x
- Category: Snack
- Method: No Bake
- Cuisine: American
- Diet: Vegetarian
Description
Delicious no-bake granola cups filled with peanut butter, honey, and chocolate chips, perfect for a quick snack.
Ingredients
- 1 cup granola
- 1/2 cup creamy peanut butter
- 1/4 cup honey or maple syrup
- 1/4 cup mini chocolate chips
- 1/2 teaspoon vanilla extract
Instructions
- Combine ingredients: In a mixing bowl, combine granola, creamy peanut butter, honey or maple syrup, mini chocolate chips, and vanilla extract. Stir until well mixed.
- Prepare muffin tin: Line a muffin tin with cupcake liners for easy removal.
- Fill the cups: Spoon the mixture into each muffin cup, pressing down firmly.
- Chill out: Refrigerate for at least 30 minutes to set the cups.
- Enjoy! Once set, remove from the muffin tin and savor the delicious cups.
Notes
Store in an airtight container in the fridge for up to a week or freeze for longer storage. Consider using crunchy peanut butter for extra texture.
Nutrition
- Serving Size: 1 cup
- Calories: 150
- Sugar: 8g
- Sodium: 90mg
- Fat: 10g
- Saturated Fat: 2g
- Unsaturated Fat: 8g
- Trans Fat: 0g
- Carbohydrates: 15g
- Fiber: 2g
- Protein: 7g
- Cholesterol: 0mg